Introducing the all new Essor EMR
The compact digital Electrical Medical Records assistant that your health facility will need.
A snapshot of what to expect in the Essor EMR
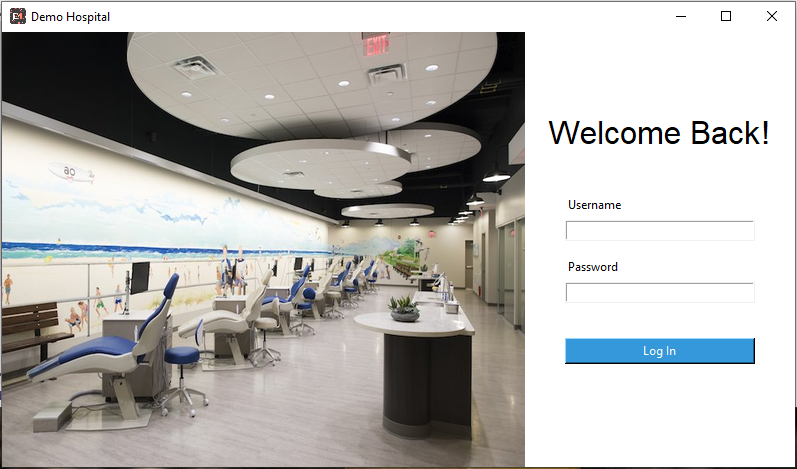
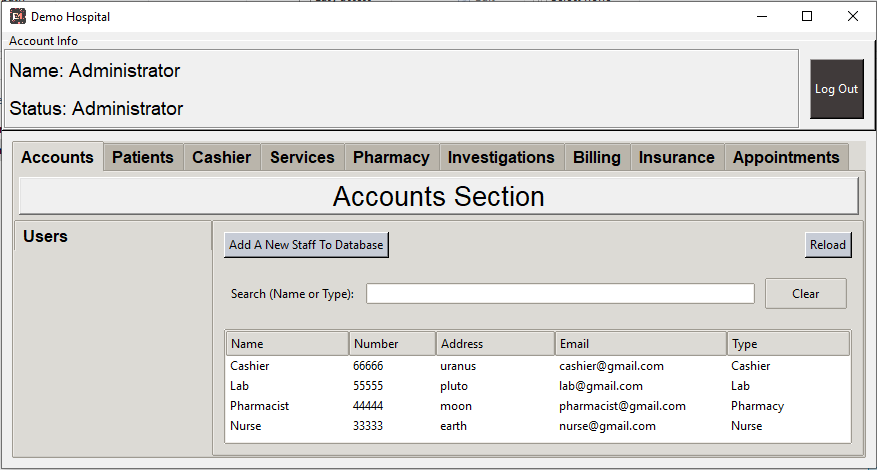
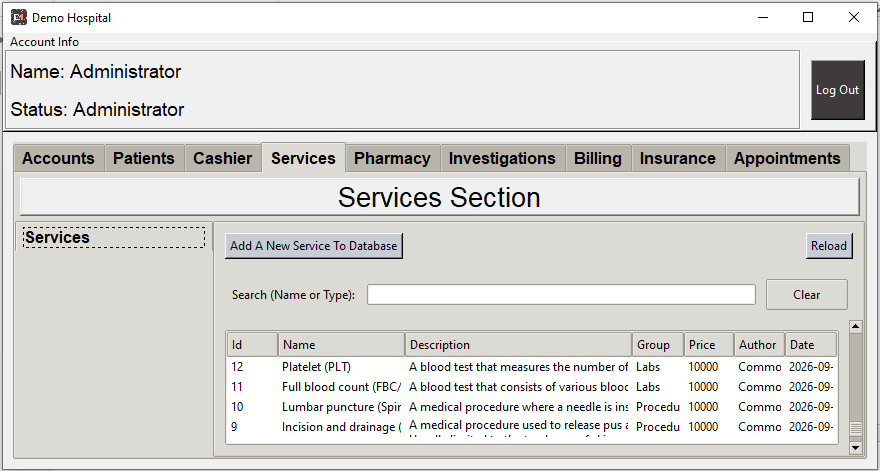
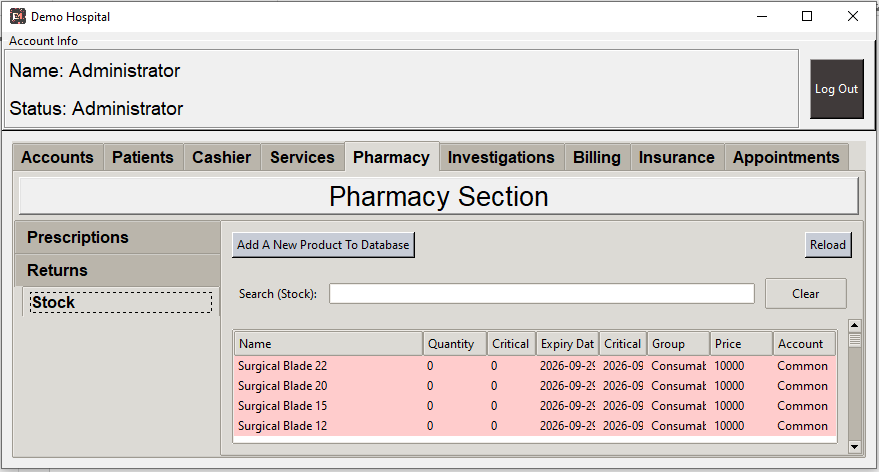
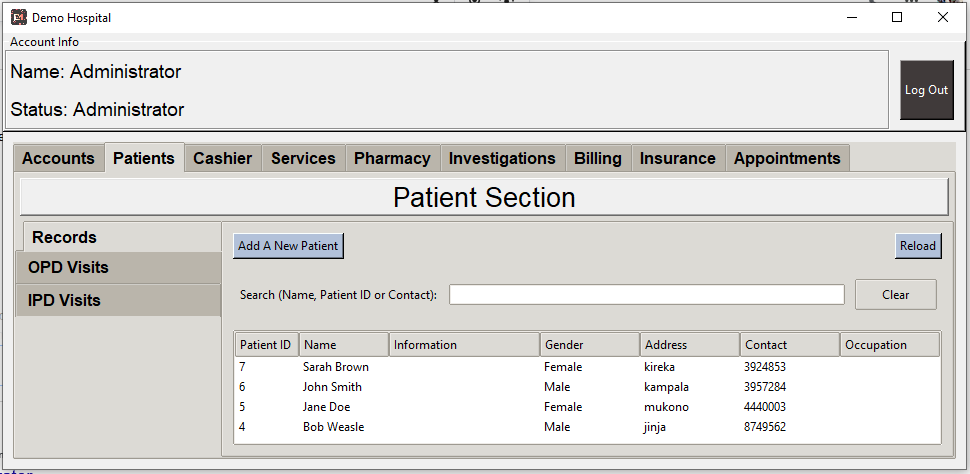
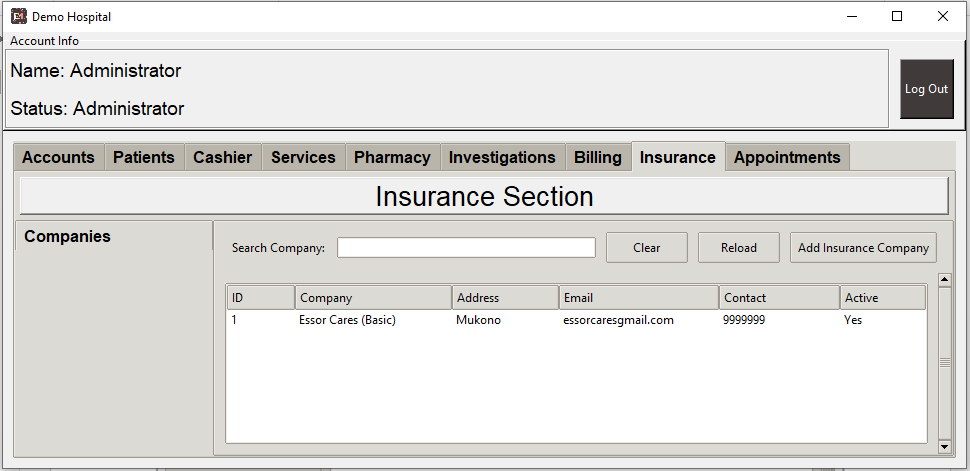
A summary of what to expect
How to use
Introduction
In this tutorial we shall be using our offsite cloud server
Which is accessible in the demo version
Login
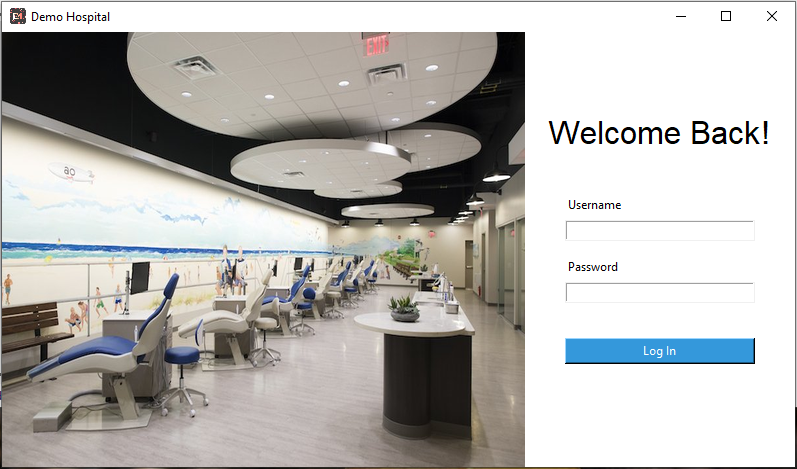
Administrator
Username; 1
Password; 1
Doctor
Username; 2
Password; 2
Nurse
Username; 3
Password; 3
Pharmacy
Username; 4
Password; 4
Laboratory
Username; 5
Password; 5
Cashier
Username; 6
Password; 6
Getting Started
Adding/editing/deleting staff to the database
Rights:
Only Administrators can do this.
Section:
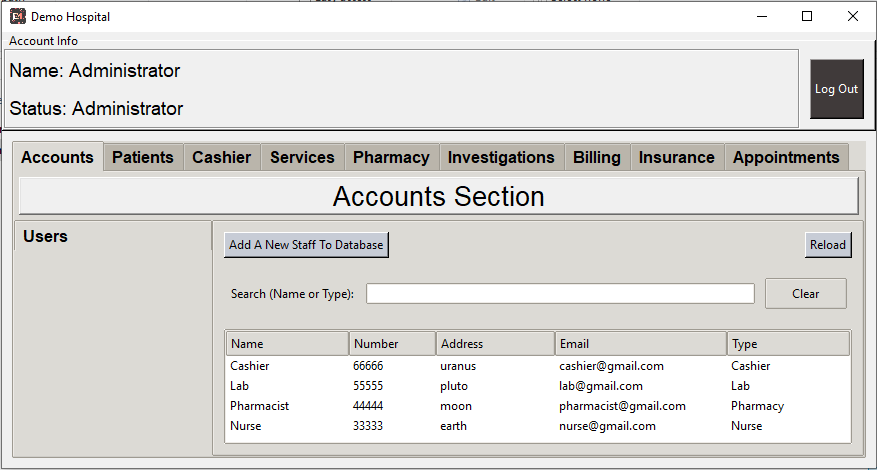
Accounts section
Actions:
Add a new staff
Click Add A New Staff To Database
Fill in the relevant information
Edit/delete staff information
Click any staff in the list
Adding Services (Fees, Labs, Investigations, Procedures) to the database
Rights
Administrator
Doctor with supervision rights
Nurse with supervision rights
Lab with supervision rights
Section
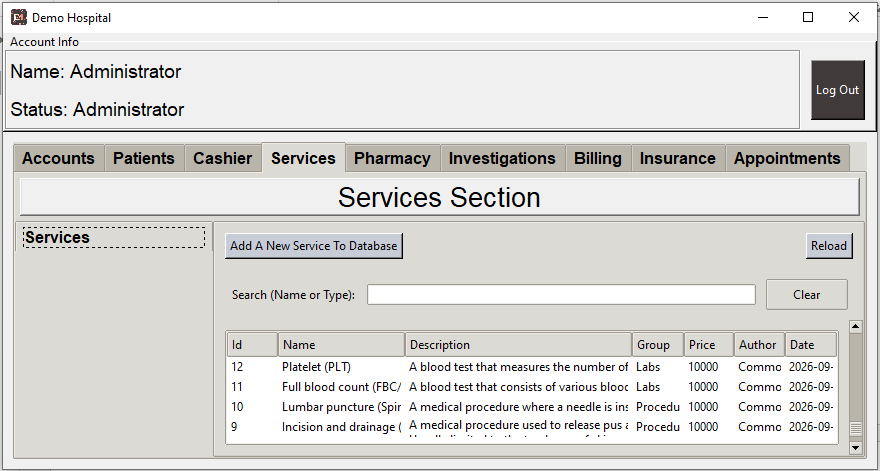
Services
Action
Add a new service
Click Add A New Service To Database.
Fill in the relevant information.
Edit/delete service information.
Click any service in the list.
Adding Drugs and Consumables to the database
Rights
Administrator
Doctor with supervision rights
Nurse with supervision rights
Pharmacist with supervision rights
Section
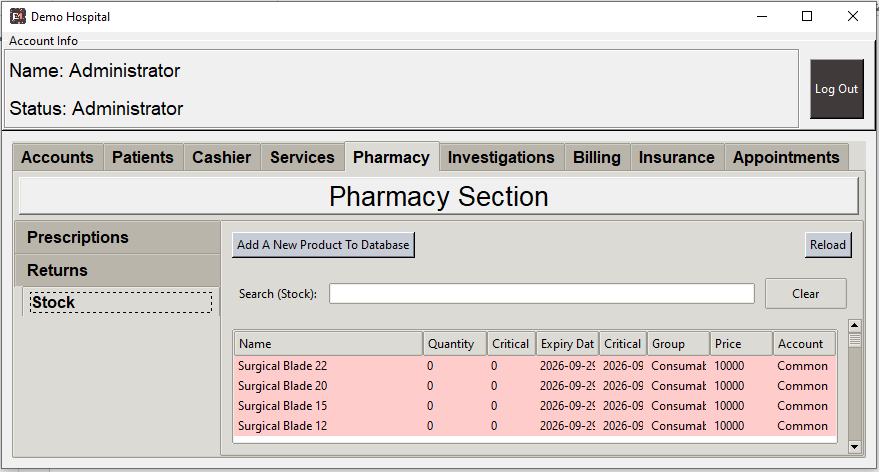
Pharmacy
Action
Add a new drug or service.
In the Stocks tab, click Add A New Product To Database.
Fill in the relevant information.
Edit/delete stock information.
Click any product in the list.
Adding Insurance Companies to the database
Rights
Administrator
Cashier with supervision rights
Section
Pharmacy
Action
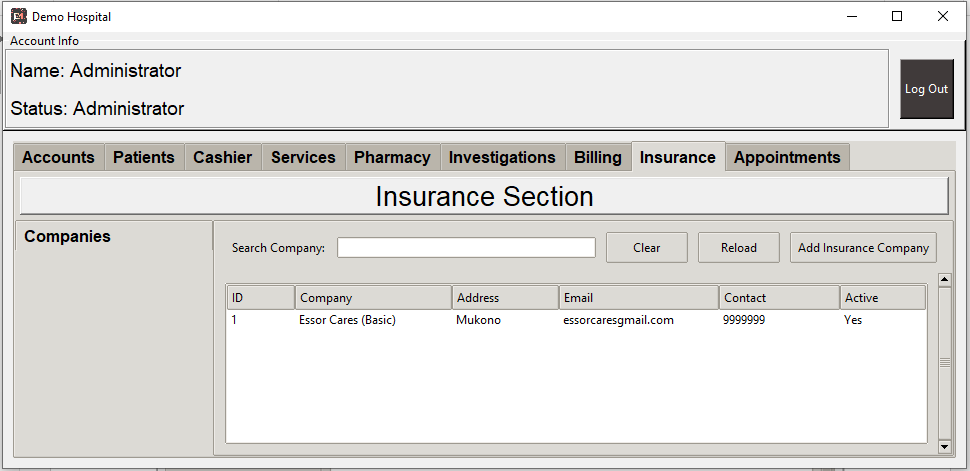
Add a new insurance company
Click Add Insurance Company
Fill in the relevant information
Edit/delete insurance information
Click any company in the list and edit as necessary
Adding Patients to the database
Rights
Administrator
Doctor
Nurse
Section
Patients
Action
Add a new insurance company
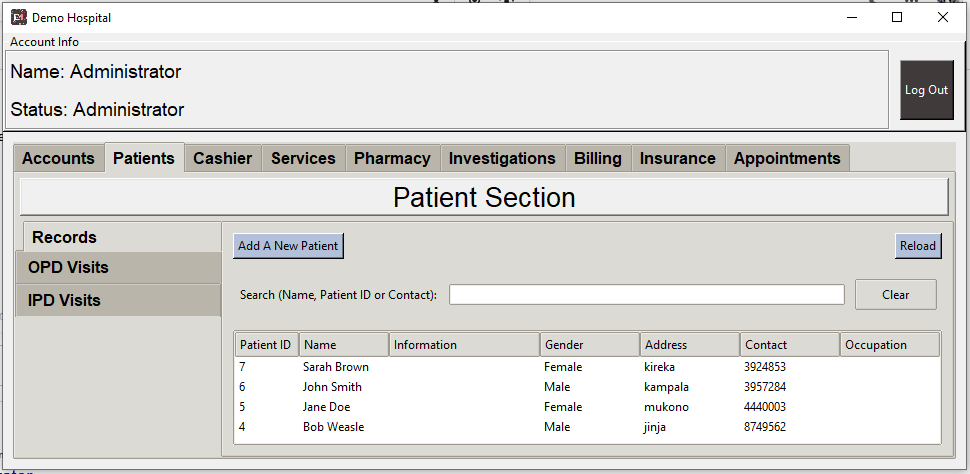
Under Records tab, click Add A New Patient
Fill in the relevant information
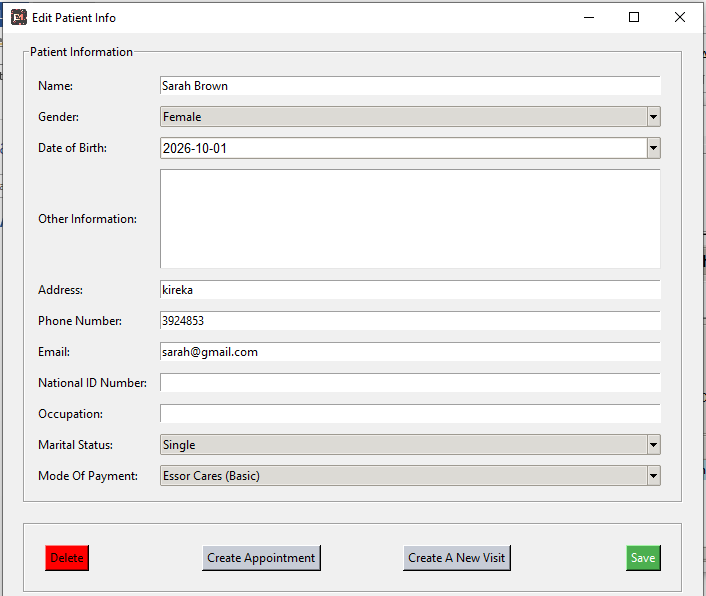
Edit/delete patient information
Click any patient in the list and edit as necessary
You can also add a patient visit or create an appointment
Patient Encounter Scenarios
Receptionist
In the “Patient Section”, under the “Records” tab, search and select the patient that has come for a visit.
In the popup, click “Create A New Visit”.
Another popup will appear
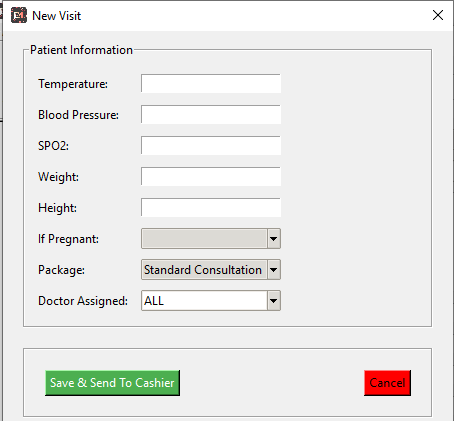
Enter the patient vitals and other information (Not a must).
Once done, click on “Save & Send To Cashier”.
Only patients that have paid can appear under “OPD Visits” after activation by the cashier.
Therefore after the receptionist, the next point is to the Cahier’s desk.
Hints; It is much easier to search a patient ID instead of typing in long names.
Cashier
In the “Cashier Section” under the “OPD Visits” tab, the cashier can search or select the patient.
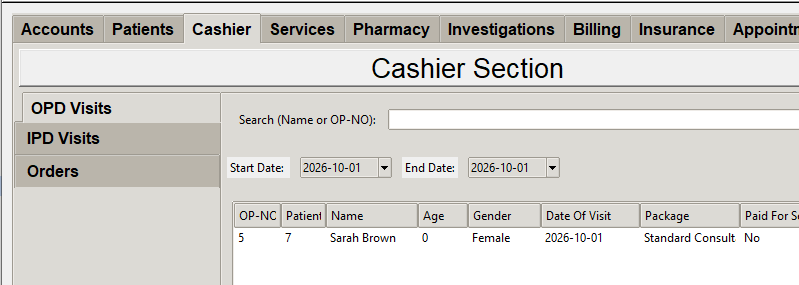
On selection of a patient, a popup will appear as shown below.
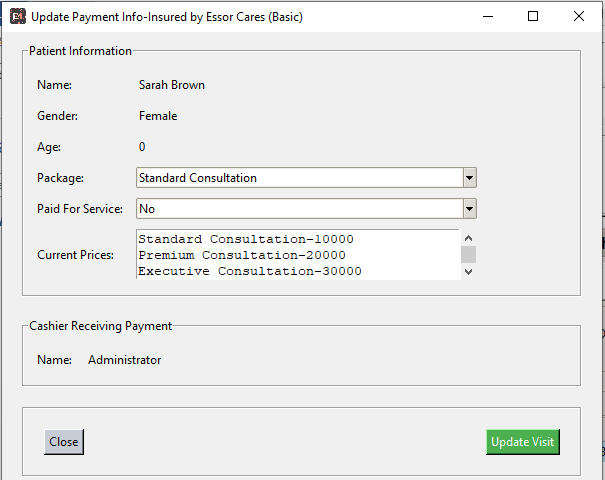
Choose the consultation package.
Confirm payment for services
No-if no payment was made
Insured-after confirmation with insurance company
Yes-after getting the cash from the patient
Click “Update Visit” to activate the patient OPD Visit.
Now that the visit is active, the doctor can now access the patient.
Therefore the patient can now go into the consultation room.
Doctor
In the “Patient Section” under the “OPD Visits“ tab, a list of activated patients will appear.
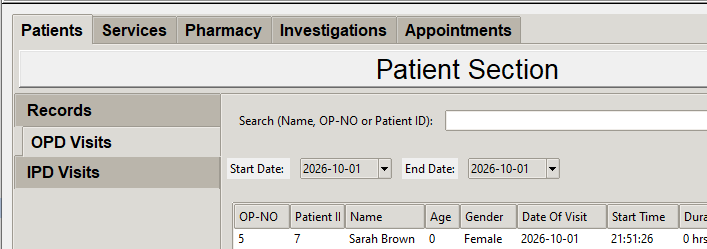
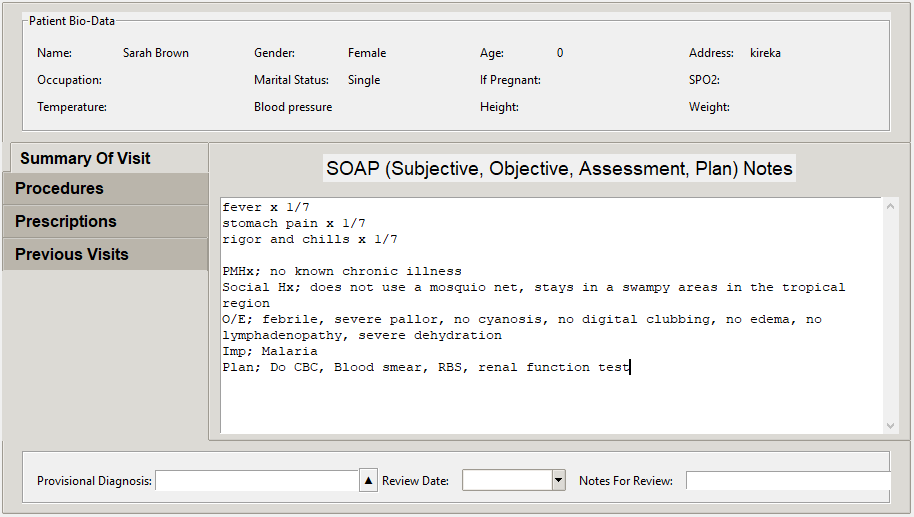
Select the patient and a popup window will appear as shown below.
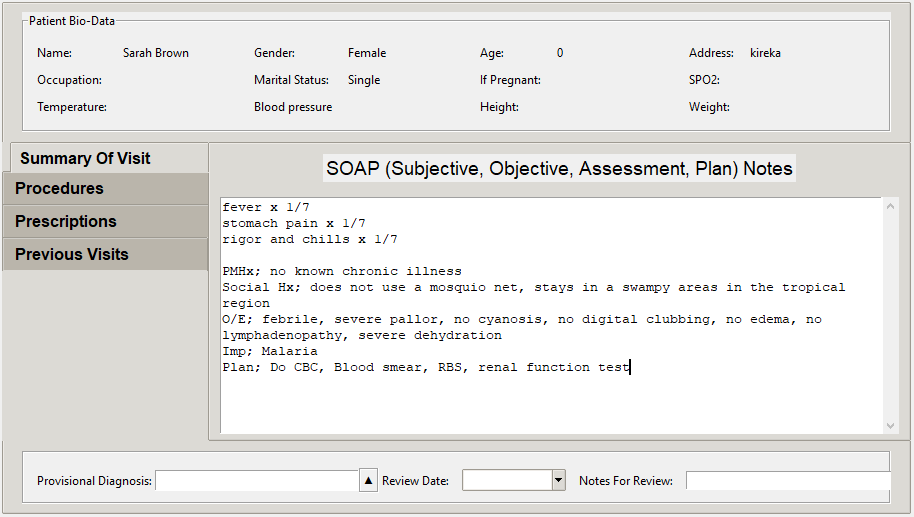
In this popup, the doctor can document and request for various procedure, labs, medication etc.
“Summary Of Visit” tab; here the clinician documents a summary of the visit.
“Procedures” tab; to request for services/procedures such as Labs, Imaging, Fees.
“Prescriptions” tab; to request for drugs and consumables.
“Previous Visits” tab; to see the previous visits.
Once the clinician is done documenting, the patient can either go to the lab for investigations or to the pharmacy for medication.
Investigations
In the “Investigation Section” requested lab tests, procedures, fees can be seen.
Pharmacy
In the “Pharmacy Section” under the “Prescriptions” tab, various drug prescriptions will appear.
Billing
In the “Billing Section” you can view and document the expenditure of any patient by each visit.
This is important especially for the insurance patients.
Terminology
Organization: The people, entity or purchaser of the product.
Devices: This refers to desktop or laptop computers
Installation Requirements
This can done by our team on the organization’s premises.
Software
Made available once payment is made.
Software installation, modification of settings and testing is done on the organization’s premise.
The software works on Windows, Linux and Apple systems.
Hardware
Servers
This is where the data is stored, retrieved, written and deleted from.
On premise Cloud/Server based systems
Setup
Onsite server with a static dedicated IP (This can be NAS (Network storage system)
Computers
Network switch
Ethernet cables
Advantages
No Monthly subscriptions
Independent of internet shutdowns
Disadvantages
Initial cost is high
Requires computer knowledge
Off premise Cloud/Server based systems
Setup
Computers
Advantages
No Monthly subscriptions
Independent of internet shutdowns
Disadvantages
Initial cost is high
Requires computer knowledge
Computers
These are the devices used to communicate with a server.
Minimum number of devices
The number can be range from 3 to more depending on the organization’s setup.
Our team recommends at least 7 devices;
1 Device for the reception
1 Device for the cashier/biller
1 Device for consultation room
1 Device for ward
1 Device for the laboratory/procedures/investigations unit
1 Device for the pharmacy
1 Device for the administrator
Considerations when buying a device
Ability to handle power black outs
Accessibility to internet
Pricing
Licensing Model
The live software uses a “Concurrent User” licensing model. This means that one purchase can be accessed by all individuals in the organization.
Price (Uganda shillings)
Software |
1,200,000 |
Onetime purchase and installation fee (all computers on premise) |
Training |
800,000 |
For every training session (3 days training session onsite) |
Hardware |
0 |
Variable, as an organization may have its own hardware setup |
Support |
300, 000 |
Yearly |
Maintenance |
0 |
One time purchase that will not be maintained |
Server |
100,000 |
Every month for those without servers |
Expanding |
100,000 |
For every visit to add computer/s to the system |